You’ve poured days if not months of work into collating a comprehensive family tree through your MyHeritage research. You’ve even signed the entire family up for DNA tests to really get an idea of where you come from. Now what? How are you going to preserve this priceless family history?
Many people stop at this point, with a sea of names and dates strewn across the table or hastily dumped into a scrapbook. But as an old friend of mine used to say, “Research isn’t finished until it’s published.” Sure, there’s always the classic family history Word document that gets sent around the clan, but will it actually ever be read?
Today I want to look at an alternative and engaging way to present your family history that the grandkids just might be willing to watch: a family history video.
What Is A Family History Video?
A family history video is a filmed interview in which you share the history and life stories that you have discovered through your genealogy research. By seeing and hearing these tales from you, the audience gets to connect with your passion. It’s a lot like listening to stories around a campfire.
How Do I Incorporate My Research?
The first task is to collate all of your marvelous genealogy research into something that will translate well to video. Let’s be clear though: this does not mean reciting names and dates for 20 minutes! Remember that we want to make your family history video engaging, and that means telling a story. Stories are the way we communicate with our world. They allow us to turn dull facts into intriguing tales. It’s that funny anecdote you share with your neighbor over the fence. To start crafting your family history stories, lay out your family timeline or tree. This gives you a big picture view. Next, choose the most interesting characters or moments. Finally, break down each of these interesting sections into the DNA of a good story.
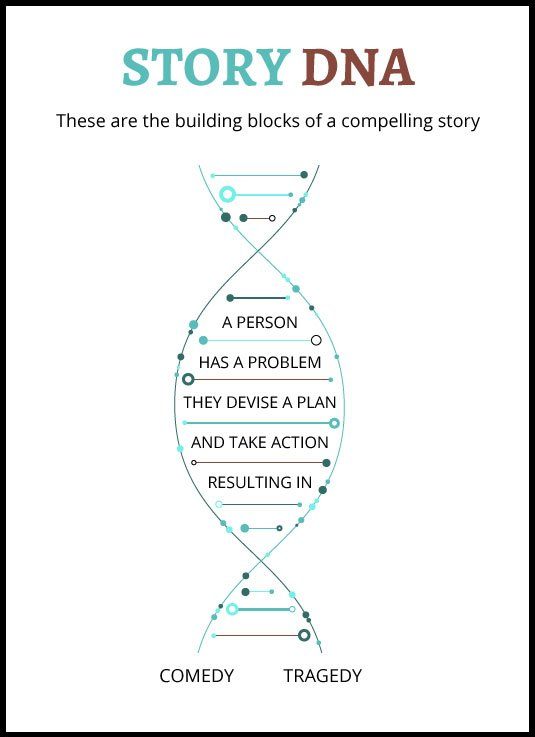
As you can see there are five steps to telling a story that will hold attention. The best stories will:
- Have a main character who…
- Faces a problem, which…
- They have to try and solve before…
- They take action and finally…
- Experience an outcome
Of course, not every story you’ll want to tell is going to follow this format. Sometimes you will need to convey a few simple facts. But aim to tell anecdotes using the Story DNA technique as often as possible to really click with your audience.
Preparing To Film
Preparing for your video is arguably more important than the filming itself. I like to use the CLIPS approach with clients so that nothing is forgotten:
Let’s break the sections down.
Clothing — What are you going to wear? It seems like a simple question, but it can cause issues if left until the last minute. Remember that you’re creating an archival document for future generations, so wear clothes that are reflective of the real you.
Location — Where are you going to film? This is about balancing practicalities and sentiment. You may be tempted to film outside, but this can introduce lots of environmental distractions. Instead, aim for a quiet place inside where you feel comfortable.
Interviewer — Who is going to interview you? You can try to do it yourself, but most people find it easier to talk to another person. Choose a person with whom you can talk easily. Surprisingly, this might not always be a close family member.
Participants — Who is going to be interviewed? You can opt to do a solo interview, which is the easiest option. But you could also consider getting other family members to share their stories, having couples interview together, or even brave bringing in the grandchildren.
Stories — What stories are you going to tell? Using the Story DNA technique above, have all of the stories that you want to tell written down before you step in front of the camera.
Creating Interview Questions
The first step is to determine the focus of your video. Your family history video could focus on your family heritage, your own living history, or a bit of both. Once you’ve decided on your focus, grab some paper and start brainstorming aligned topics such as ancestry, schooling, the early years, career, etc. Now that you have a list of possible topics, go back to your best Story DNA characters/moments and start crafting related questions for your interviewer to ask.
The key is to create open-ended questions. These are questions that phrase things in such a way that you’re compelled to reply with more than just “yes” or “no.” These types of questions often start with “what,” “how,” or “why.” If you’re stuck, here is a downloadable list of questions to ask when interviewing relatives. Remember to tailor your choices to what you want to archive.
Filming Your Family History Video
As this is a do-it-yourself guide, we’ll assume you are most likely to be using either a mobile phone or digital camera to create your family history video. These are great tools for anyone on a budget, but they require a bit of extra work to produce their best quality.
Strangely enough, it’s audio that can make or break your video. After all, if people can’t hear you talking about your family history, then all the beautiful cinematography in the world counts for nothing. For this reason, make recorded audio quality your first priority.
The two options available are to either sit as close as possible to the camera or to spend a small amount of money on a microphone. Even a cheap $20 lavalier microphone is going to produce better audio quality than your on-camera microphone.
The second most important factor is the lighting. We want your great-grandchildren to be able to see the expressions on your face. As a professional lighting setup is both expensive and requires a lot of practice to master, we’ll rely on natural light using a technique called “feathering.” The easiest way to feather is to find a nice big window in your home. Sit right at the edge of the window and have your chair about a meter away from the wall as you can see in the photo below:
Now when you place the camera opposite you, you will get beautiful, soft light across your face.
Lastly, be sure to stabilize your camera. If you’re using a mobile phone then a cheap mini-tripod is a must. For a larger camera, you could either invest in a light tripod or at the very least try to balance it on a flat surface around the same height as your face.
Making Your Family History Video More Personal
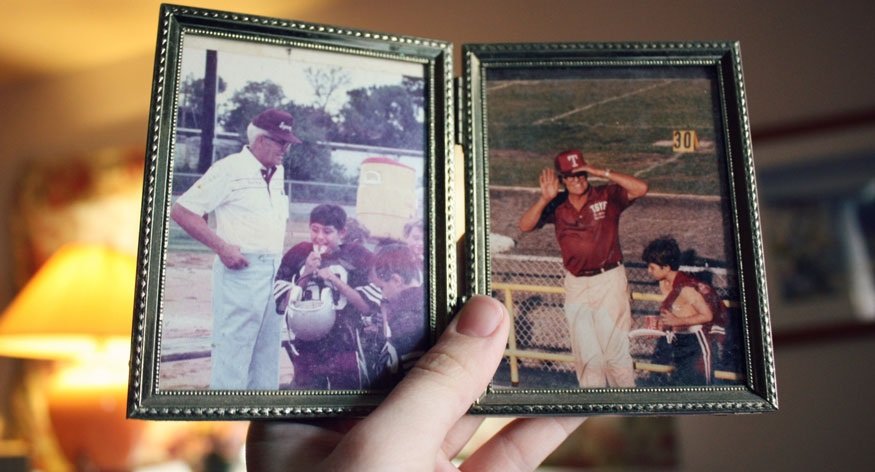
To give your film something special, consider showing important objects from your history. This might be a family heirloom or even the family pet. It’s a wonderful addition to have you presenting the item and sharing your passion. Another great extra is to show some photographs. This can easily be done just by holding them up as you talk. If you’re a bit more tech-savvy you can also scan your images and insert them into your final video with editing software.
Finalizing Your Video
If you would like to avoid having to edit your family history video, then aim to film your interview in one sitting and accept that there may be some pauses and “umms” throughout. Don’t be scared of editing your video, however. Most home computers come with bundled video editing software that will allow you to make basic edits and insert titles. There are also plenty of mobile phone apps that will allow you to edit directly on your phone. Whilst editing is more effort, the final product will look much better and is guaranteed to engage your audience more.
In Summary
Creating your own family history video is relatively simple, and is a great option for anyone willing to do a bit of preparation. It’s a wonderful way to compile all of your MyHeritage research into a package that can be shared with relatives all over the globe.
Remember:
- Prepare for all the practical aspects using CLIPS.
- Break down your Story DNA.
- Create interview questions that are open-ended.
- Spend time getting your audio and lighting spot on. It never hurts to do a quick trial interview.
Most importantly, have fun and enjoy creating this timeless keepsake. It truly is something you and your relatives will cherish for generations to come.